How to Install a Rear Spoiler
A well-installed spoiler enhances your vehicle’s aerodynamics and gives it an aggressive, performance-ready look.
However, improper installation can lead to:
- Wind noise at high speeds
- Poor adhesion and potential detachment
- Misalignment and uneven gaps
This step-by-step guide will walk you through the professional way to install a spoiler using automotive-grade adhesive tape for a perfect, long-lasting fit.
Tools & Materials You’ll Need
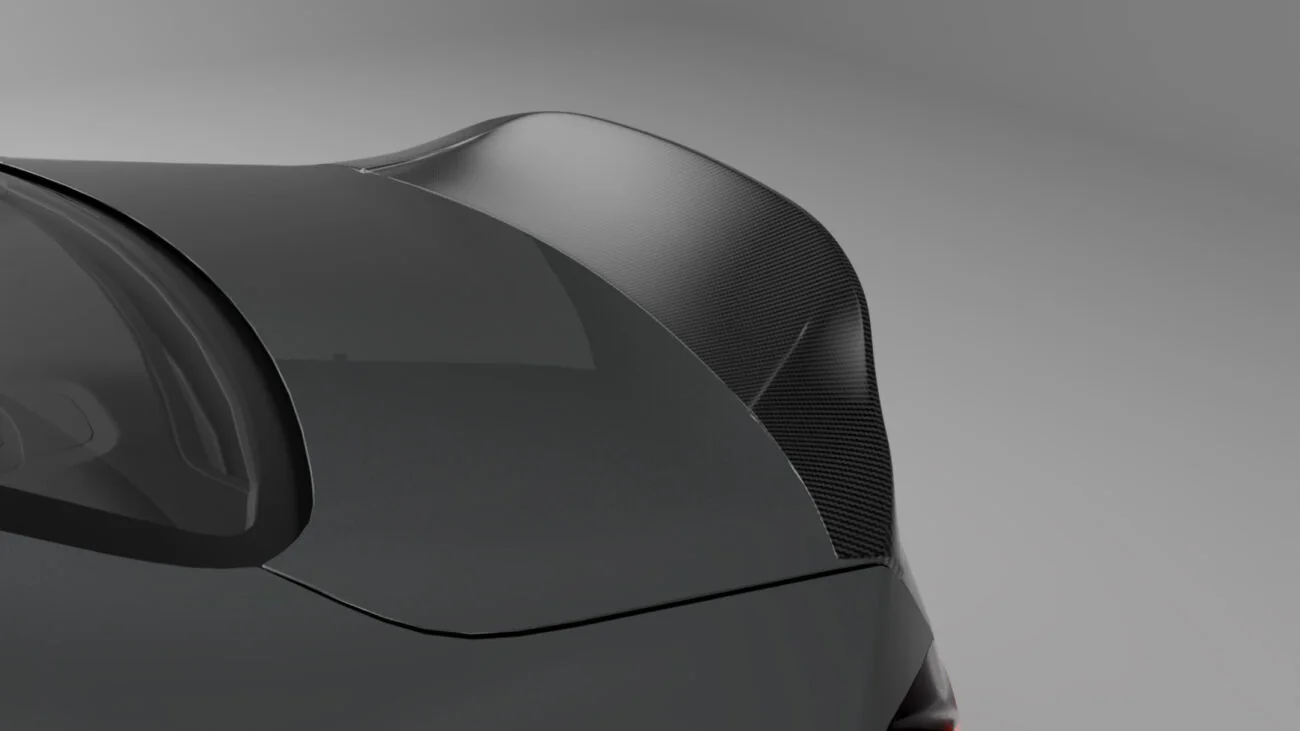
Spoiler – pre-painted for best results (All our spoilers comes factory-finished. No additional painting required)
3M VHB Automotive Tape – the gold standard for spoiler adhesion (Every order includes)
Isopropyl alcohol & microfiber cloth – (for surface prep)
Masking tape – (for test fitting)
Heat gun or hairdryer – (optional, for stronger bonding)
Pro Tip: All our spoilers (including our own) come with pre-applied 3M tape for easier installation.
Step 1 – Surface Preparation (The Secret to Long-Lasting Hold)
1. Clean the Spoiler & Trunk Surface
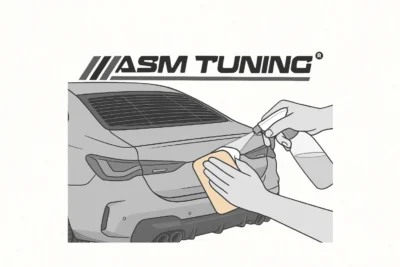
- Wipe down both the spoiler’s mounting surface and car’s trunk lid with isopropyl alcohol to remove wax, grease, and contaminants.
- Allow to dry completely—any residue will weaken adhesion.
2. Apply Adhesive Tape for Maximum Hold
- If your spoiler doesn’t have pre-applied tape, cut 3M VHB tape to fit the contact points.
- Press the tape firmly, ensuring full edge-to-edge coverage for optimal bonding strength.
Why This Matters: Cheap tape can fail over time—always use our included automotive-grade adhesive like 3M VHB for a permanent hold.
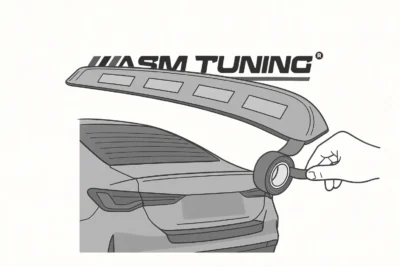
Step 2 – Test Fit Before Permanent Installation
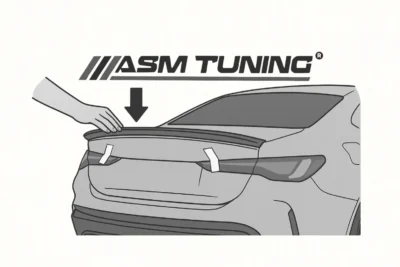
How to Ensure Perfect Alignment
1. Place the spoiler on the trunk lid without removing the tape’s red backing film.
2. Check alignment from multiple angles—use masking tape to mark positioning if needed.
3. Ensure even gaps along all edges for a factory-quality fit.
Critical Step: Always test fit before peeling the adhesive backing!
Design Note: Our spoilers are precision-molded for OEM-like fitment, reducing adjustment time.
Step 3 – Secure the Spoiler (Permanent Installation)
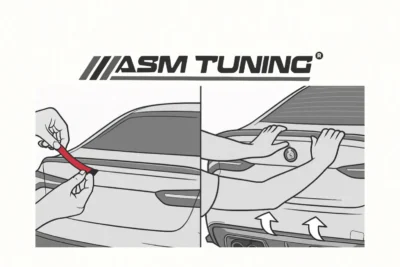
1. Remove the Red Backing Film
– Once satisfied with positioning, carefully peel the red film from the adhesive tape.
– Work slowly to avoid premature sticking.
2. Position & Press Firmly
– Align the spoiler exactly as test-fitted.
– Apply firm, even pressure for 30-60 seconds to activate the adhesive bond.
Pro Installation Trick
- Lightly heat the tape with a heat gun (low setting) for stronger adhesion before final placement.
- Avoid car washes or high-speed driving for 24-48 hours to allow full curing.
Step 4 – Post-Installation Checks
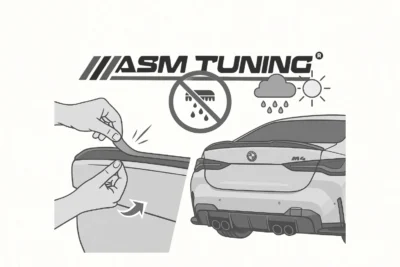
Inspect edges for any lifting—if found, apply additional tape.
Avoid automatic car washes for at least 48 hours.
Regularly check adhesion, especially after extreme weather.
FAQs – Spoiler Installation Questions Answered
Can I install a spoiler without drilling?
- Yes! High-quality 3M VHB tape (like what we include with our spoilers) provides drill-free strength when applied correctly.
Will a spoiler improve performance?
- Depends on design: Lip spoilers enhance stability at highway speeds, large GT wings provide real downforce for track use.
What if my spoiler starts lifting?
- Reapply with fresh 3M tape after thoroughly cleaning both surfaces.
Explore our engineered spoilers designed for perfect fitment & performance.
Final Thoughts
Proper spoiler installation ensures both looks and functionality.
Whether you’re adding a subtle lip or a track-ready wing, taking the time to prepare surfaces, test fit, and secure properly makes all the difference.
Installed yours? Tag us in your photos—we love seeing transformed rides!
Thank your for choosing ASM TUNING
We sincerely trust that our product will align with your expectations.
Let us know if you have any questions.
+44 (0) 121 798 0689
team@asmtuning.co.uk
team@asmtuning.co
Learn More: HOW TO FIT A SPLITTER
DISCLAIMER
These guidelines provided by ASM TUNING are only recommendations, and we highly advise that professional installers handle the installation process. ASM TUNING cannot be held responsible for any damages or liabilities that may occur from following the Company’s guidelines.
It is important to note that the misuse, abuse, or incorrect installation of ASM products may lead to significant vehicle malfunctions. There are potential dangers such as vehicle damage, serious bodily injury, disability, and even death. Any modifications made to your vehicle or someone else’s using ASM products are solely your responsibility.
ASM TUNING will not be accountable for any changes made to vehicles as a result of the misuse or abuse of its products. It is strongly recommended to seek professional installation for the products sold on the asmtuning.co website if you have little to no experience in installing them.
The products are sold as-is, and any damages or injuries sustained during installation or subsequent use of the vehicle are not our responsibility. As proper installation is crucial for the performance and longevity of our products, please carefully review the documentation and test your installation before resuming driving.